
Block of the Whenever #1
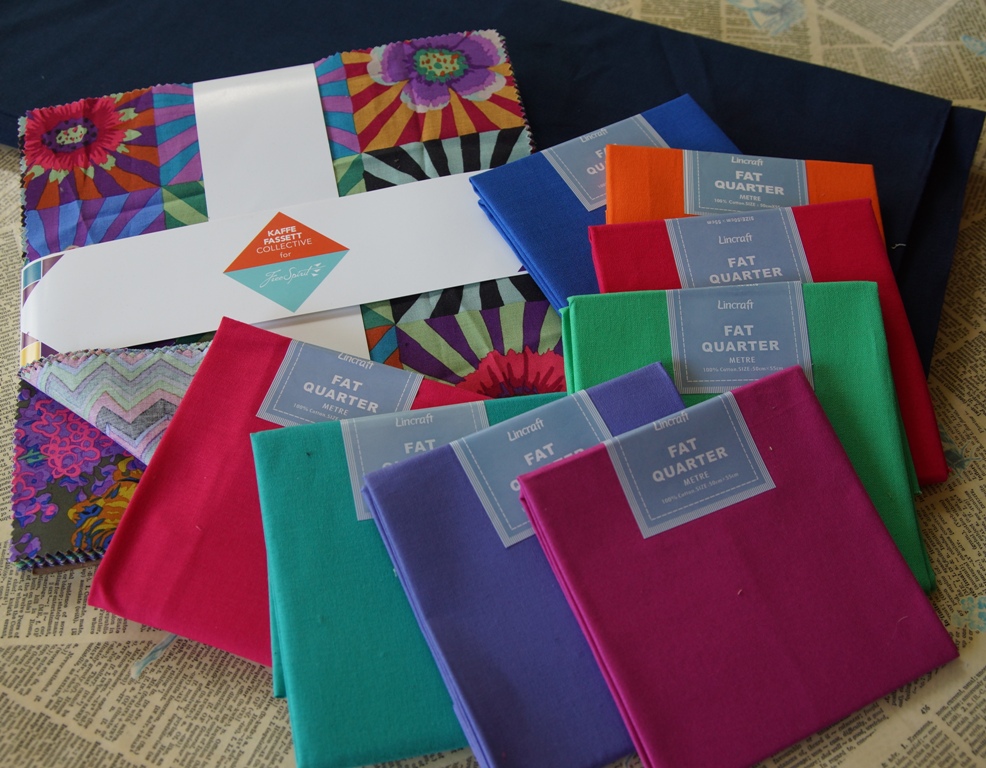
A while back, on one of my “the shipping is flat rate, so I might as well add a few more things to my cart” shopping sprees from Missouri Star, I found a layer cake of Kaffe Fassett fabrics on special. Kaffee Fassett is one of those fabric designers that you learn the name of very quickly if you follow any quilting channels or blogs, because everyone seems to be in love with his intensely colourful designs. So as it was on special, I thought it was time I investigated the possibilities of this magic fabric.
I didn’t have any particular project in mind for it, so it may have ended up waiting in my stash for months until inspiration struck, except that the other day I was in Lincraft buying another spool of the blue thread so I can finish quilting the Birds in Flight quilt (which I will get round to finishing soon, I promise), and discovered they had a new range of cheap fat quarters in super-bright solid colours. Which, I realised, would go perfectly with the colours in my Kaffee Fasset layer cake. And that was enough for inspiration to strike on exactly what sort of quilt I wanted to make with it. So I bought a handful, plus some dark navy to use as a background colour, and came home and scribbled a few sketches, and a lot more calculations, in my little quilting notebook (which is actually just an old maths exercise book), and a design was born for a sampler-style quilt.
And along with that, an idea for a series of blog posts was born. Everyone does those “Block of the Month” or “Block of the Week” quilts, with accompanying blog/YouTube posts for each block (I’ve even seen one that’s Block of the Day!), but there’s no way I could ever be that dedicated – my creativity comes in fits and bursts, not on schedule once a week. So instead, this is a Block of the Whenever quilt. I’m going to try and make a blog post for each block, but I’m making no promises about their regularity. If I get inspired, you might get a run of several posts all at once, or if I’m too busy with other stuff, there might be long gaps between blocks. But if all goes according to plan, the entire quilt will be documented as I go.
I also don’t promise these will be full-on tutorials. How much detail I go into will depend greatly on how many photos I remember to take of the process as I go, and how inspired I feel to write it up afterwards. And anyway, I’m intending that most of the blocks will be traditional block patterns that you can find a million tutorials for all over the internet. But as I’ve had to do the maths to convert patterns for various sizes of blocks to fit the size I want (which is a 9 inch finished square*), I’ll try and at least share the measurements and enough basic instructions that someone who understands the principles of how blocks go together could reproduce them (and actually, mostly my aim here is just to produce a library of blocks for myself, so I can make them again in other quilts – that’s the traditional purpose of a sampler, after all).
[* In theory. Except, spoiler alert, my quarter inch seams in my first block turned out to not be quarter inch, so my first block turned out too small. I promise you the maths is correct though, it’s just that I need to learn how to use my quarter inch foot properly…]
Also, most of these blocks and techniques I’ve found repeated in multiple places around the internet, so I’m not going to give sources, because I’ve got no idea where they originally came from (so many quilt blocks come from long traditions of being passed from person to person, with no attribution). But if there’s any that do seem to be someone’s original pattern, I’ll of course give credit.
Right, with the disclaimers out of the way, here’s the first Block of the Whenever: a Flying Dutchman (which I’ve also seen called a Double Pinwheel, or a Dutchman’s Puzzle).
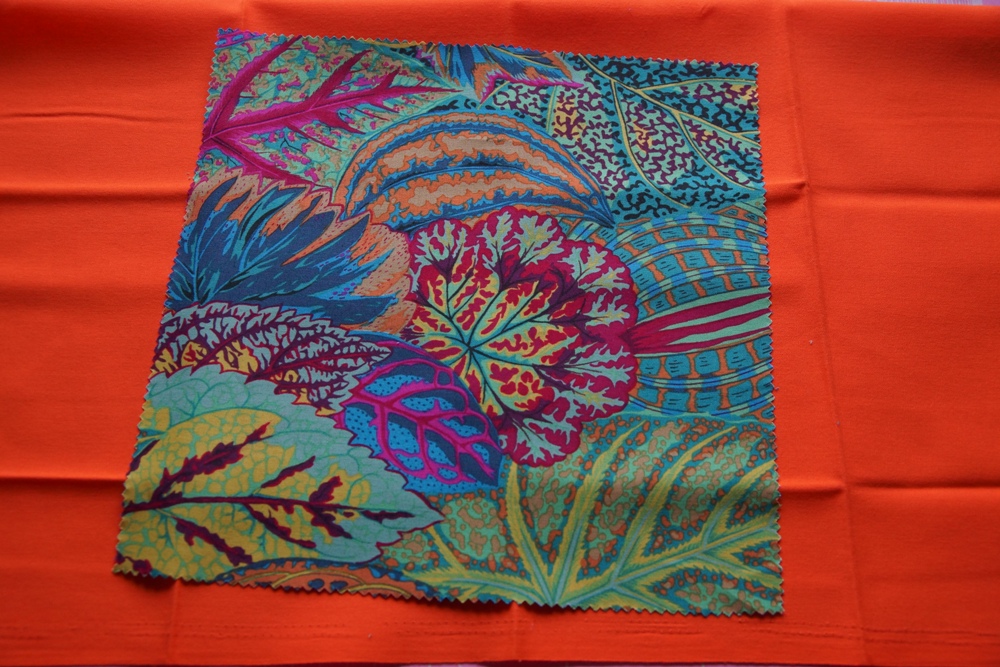
The first step (and hardest part) was choosing the fabrics. I didn’t want to start off with my favourites, just in case I messed the flying geese up (it’s the first time I’ve made them using this technique) and wasted the fabric, but it’s the first block of the quilt, so I wanted it to be a nice combination. I think this one works, though:
And then the really brave part: cutting into the fabric for the first time.
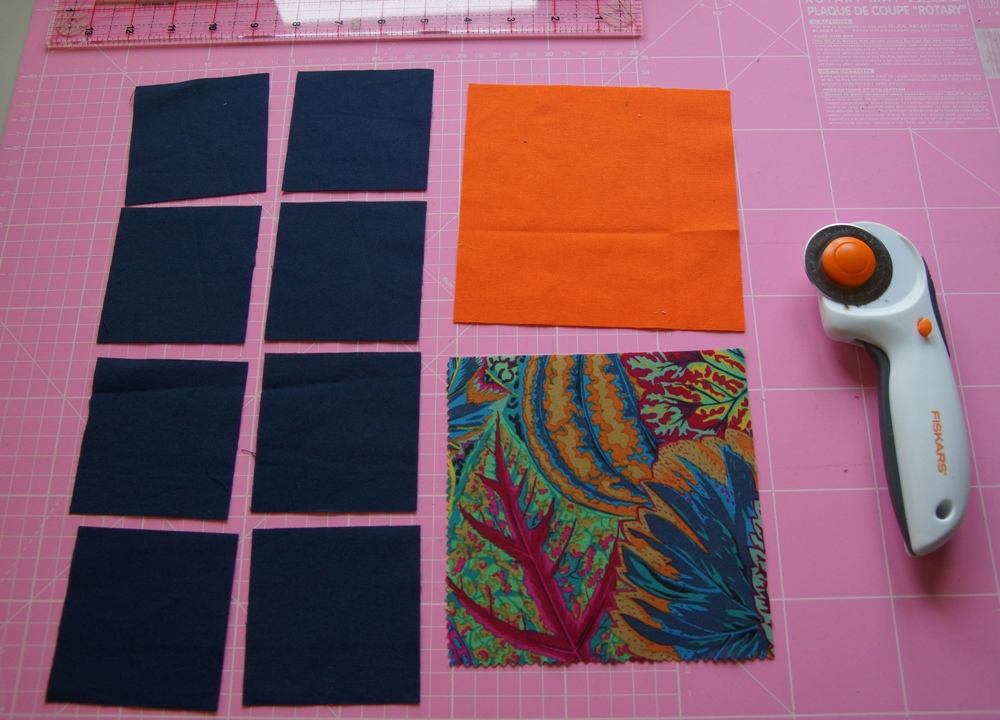
You need:
- Print: one 5 3/4 inch square
- Solid: one 5 3/4 inch square
- Background: eight 3 1/8 inch squares
This flying geese method is one of those quilting techniques that seems totally impossible. You look at that combination of pieces, and there’s no way it adds up to eight flying geese. And that impression continues all the way through until you iron open the final unit, and somehow it’s worked. It still seems totally magic, even after I worked through the maths of it while I was working out the measurements. Here’s the unlikely steps:
Mark a diagonal line across each of the background squares, and place two on diagonally opposite corners of each of the bigger blocks.
Sew quarter of an inch away from each side of the marked line.
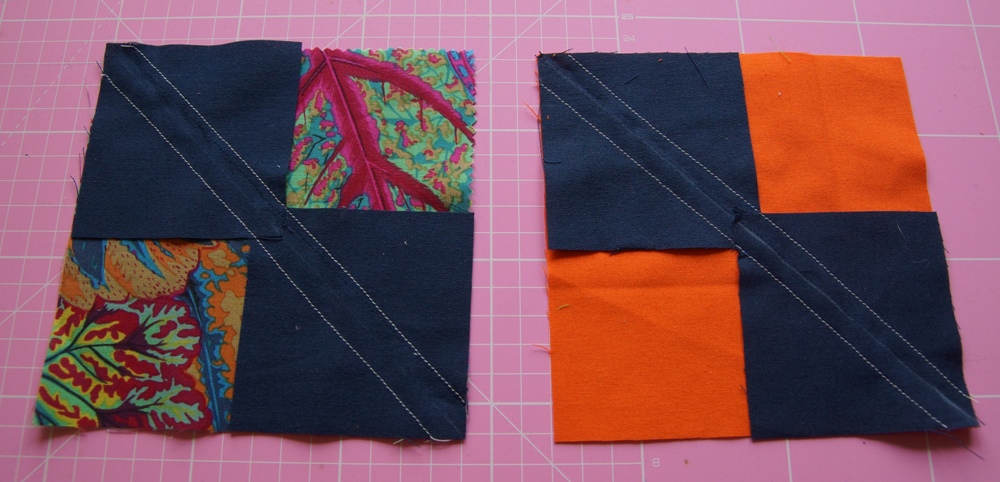
Cut along the marked lines.
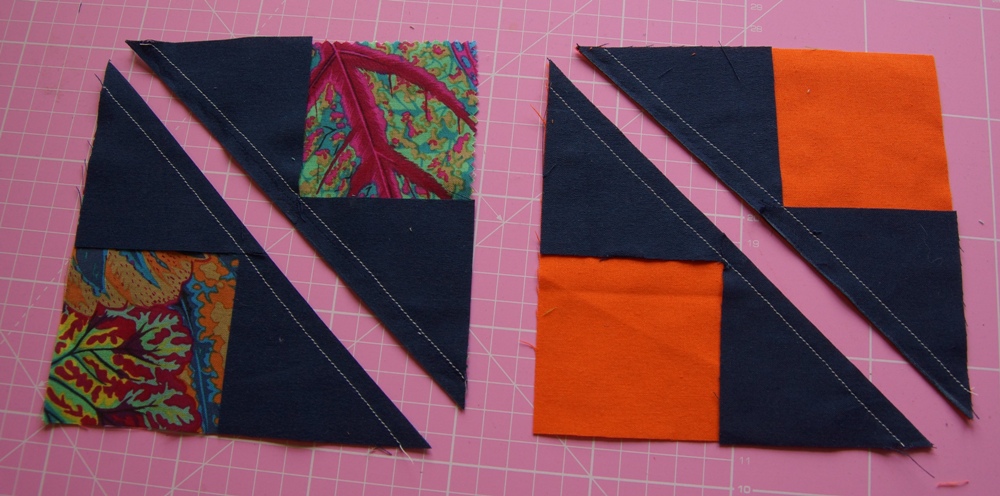
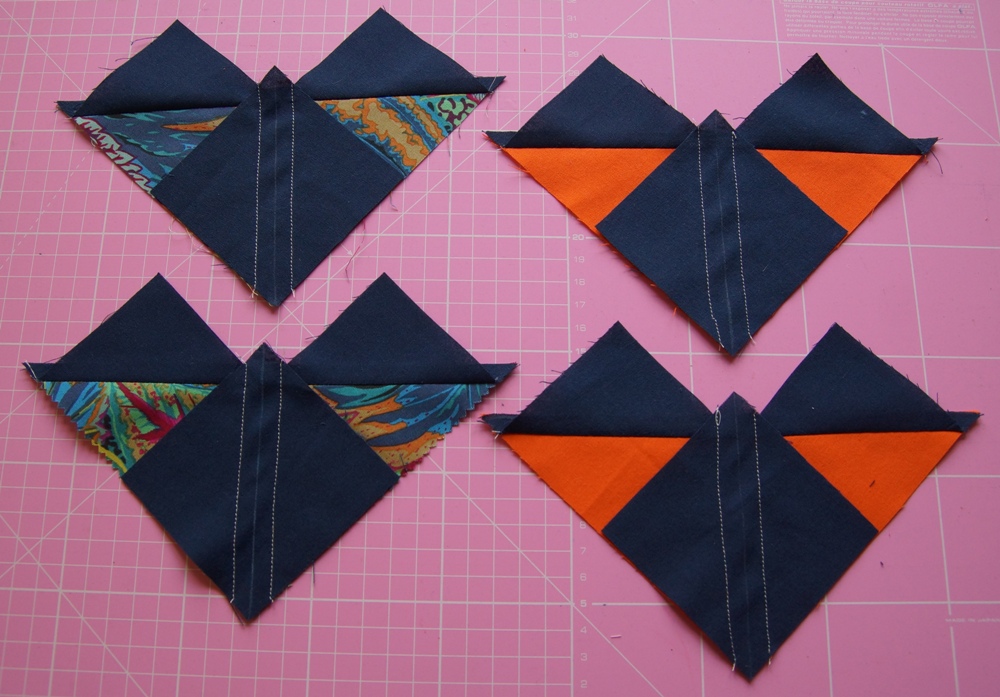
Iron open. So far, nothing like flying geese. More like weird fox faces.
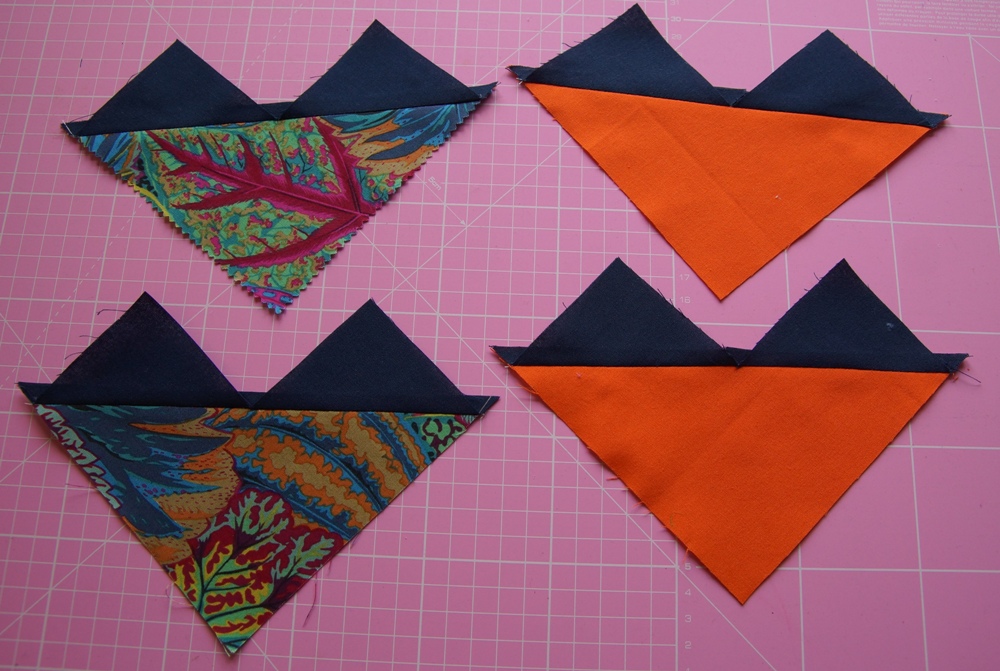
Take the remaining four background squares, and line one up on the nose of each fox.
Again, sew on either side of the marked lines.
Cut along the marked line.
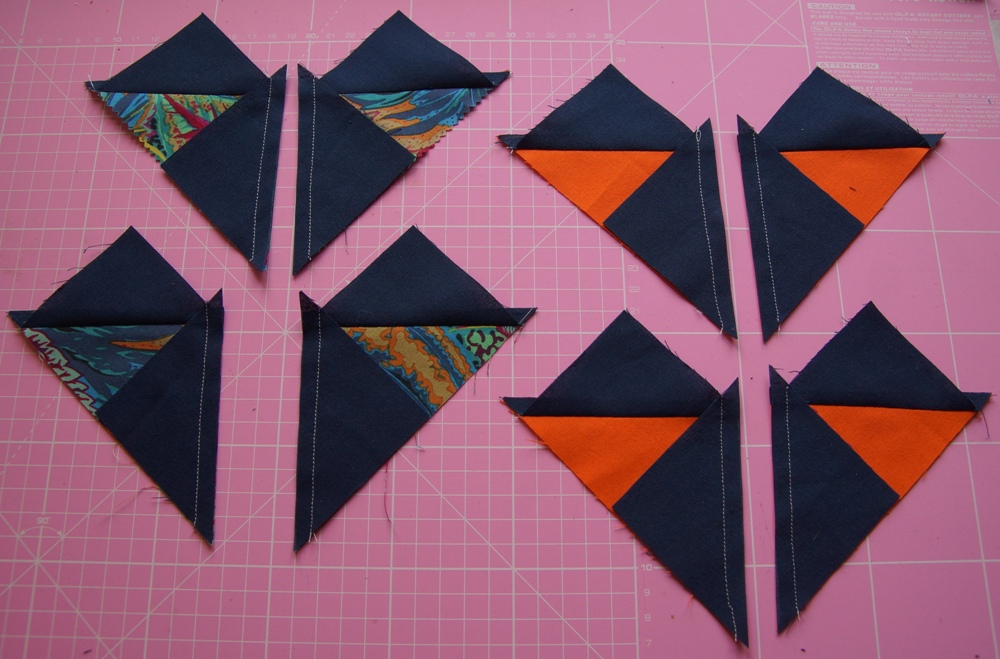
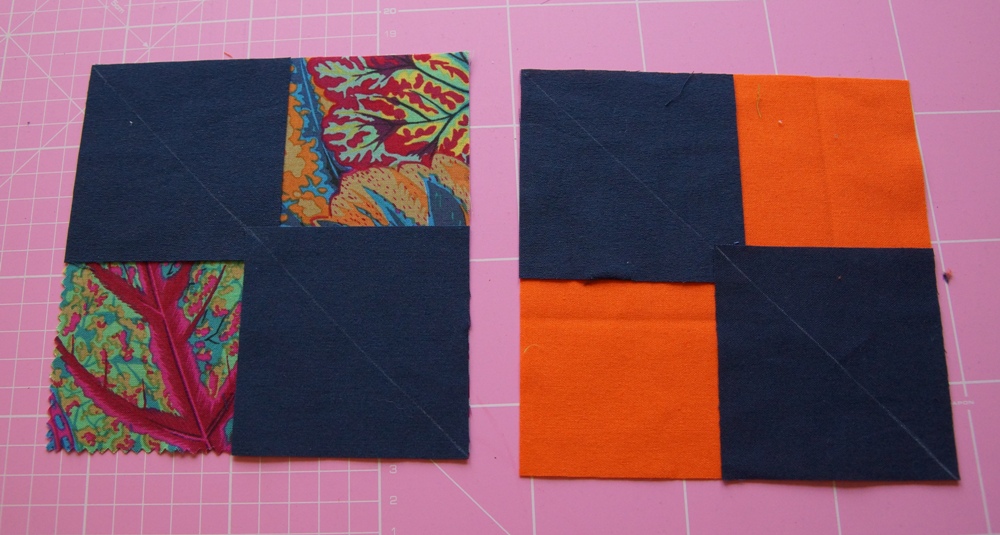
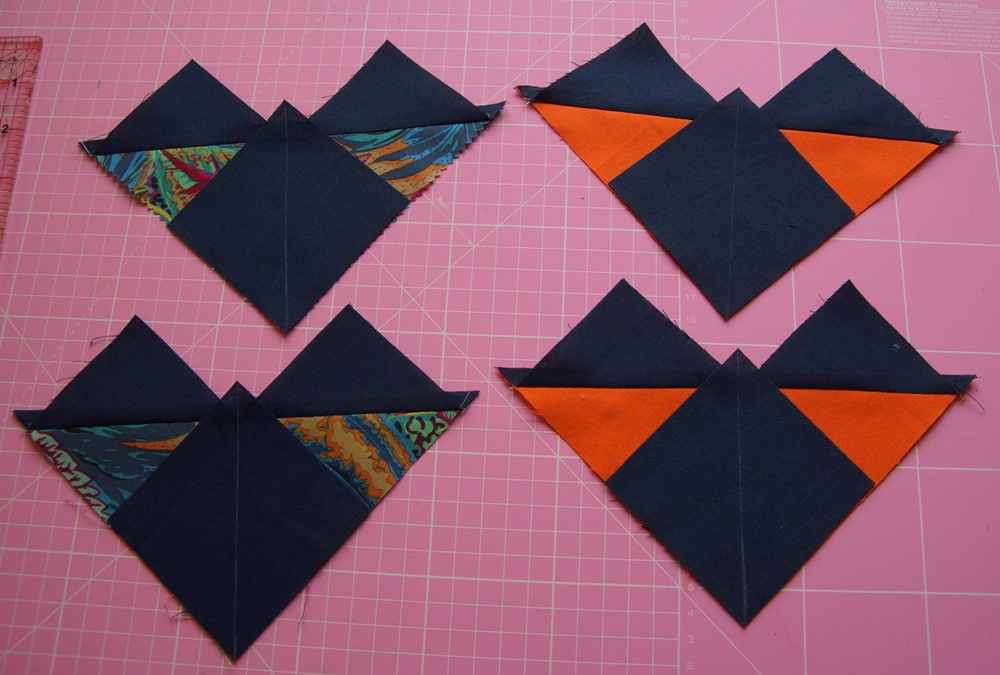
Iron open, and magically, you’ve got flying geese!
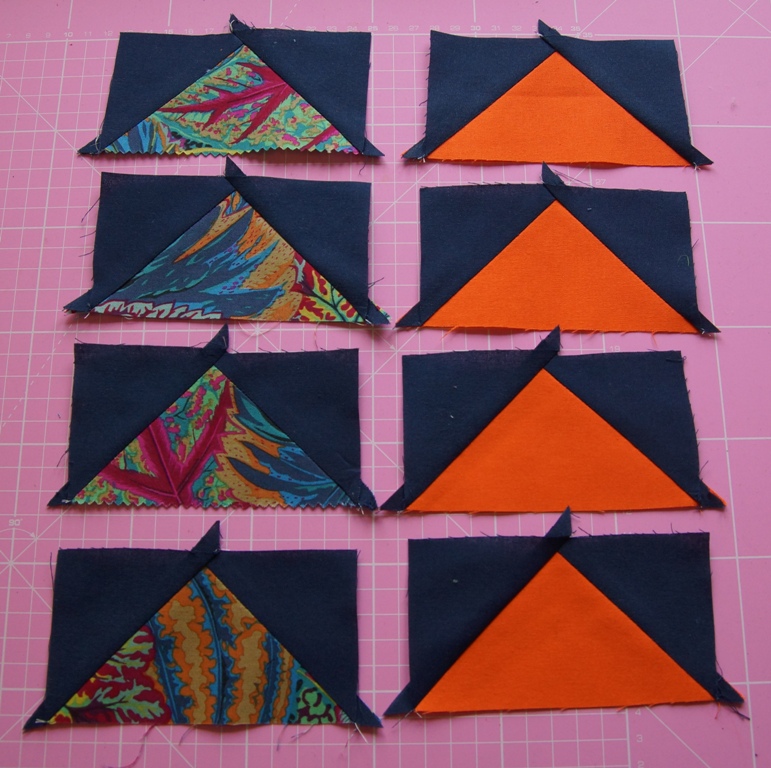
The units should each measure 5 inches by 2 3/4 inches. Mine didn’t. That’s because I was running the edge of my quarter-inch foot along the inside of the chalk line I’d marked, instead of the outside, and those few millimetres’ difference, added up over multiple seams, were enough to make the final units about an eighth of an inch too small. Which means I really should scrap this block and try again. But I decided as I’d got this far, I might as well carry on, just to see what the final block looked like.
Trim off the dog-ears, and lay out the block. There’s two possible layouts, depending on which fabric you want to make most prominent.
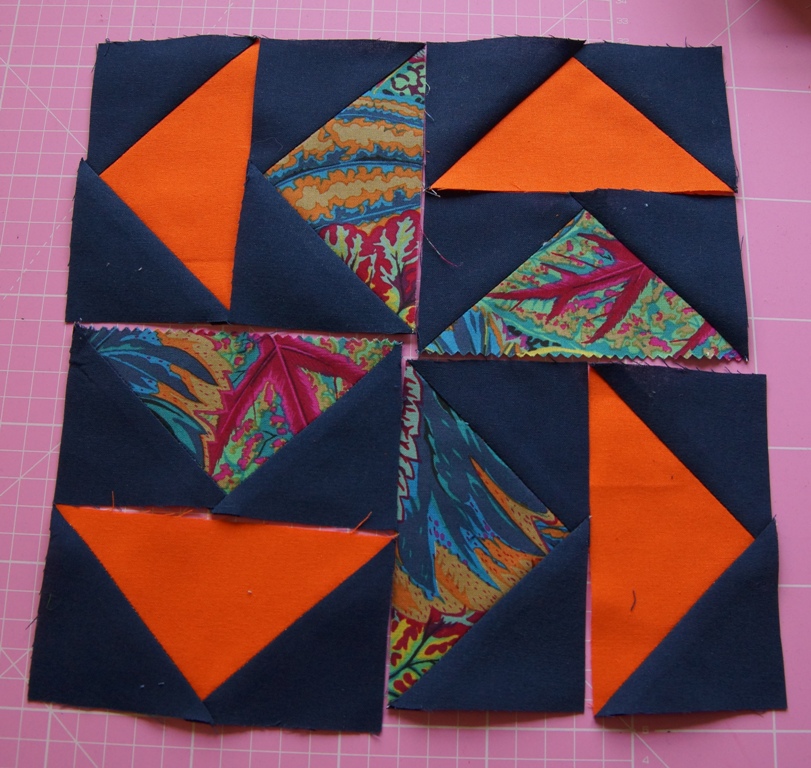
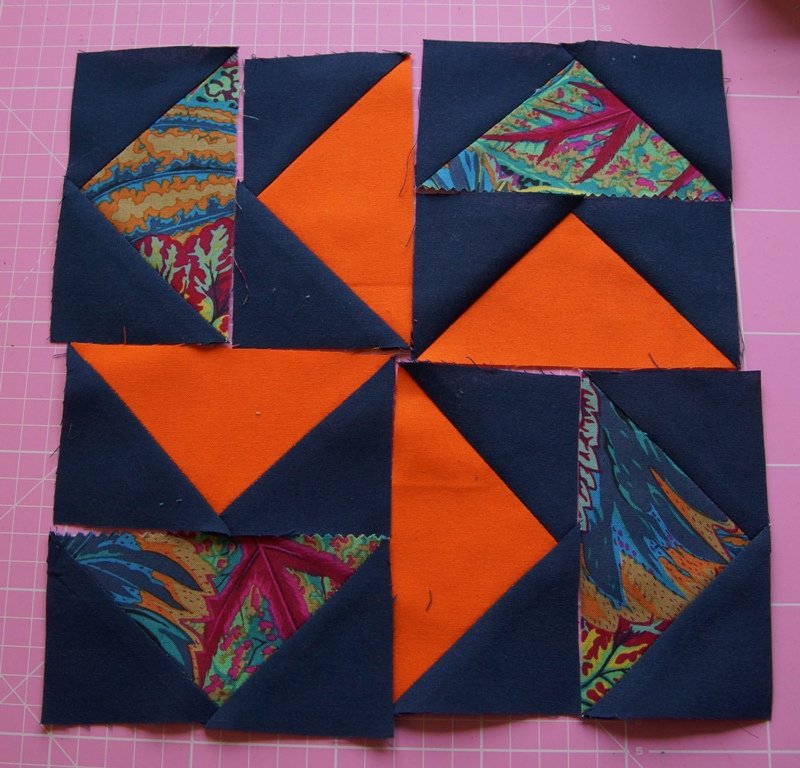
I went with the print block on the inside, because the orange dominated the block too much when it was on the inside.
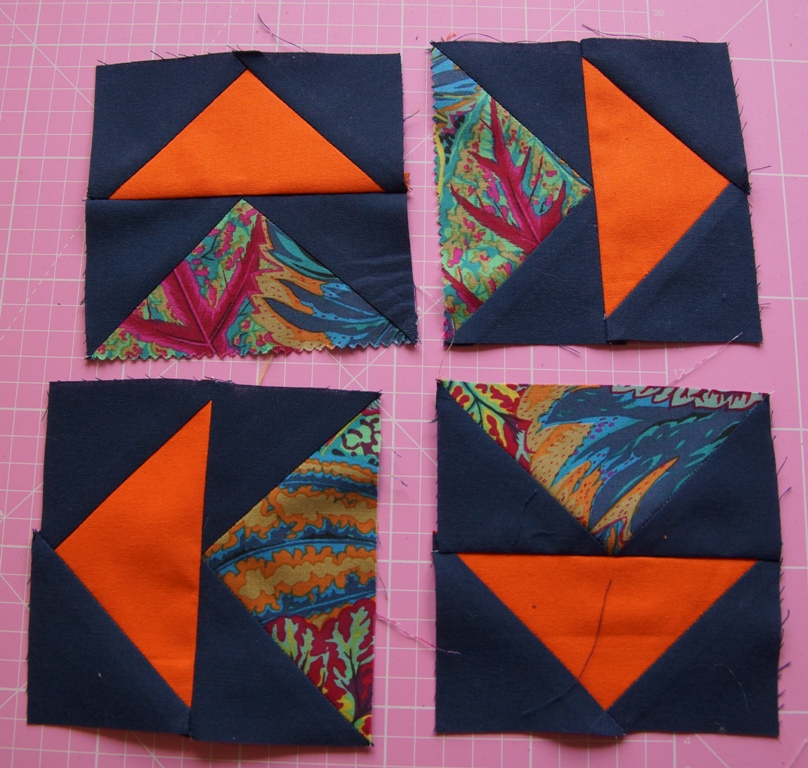
Sew the flying geese into pairs.
Then sew the pairs together as a four-patch for the final block.
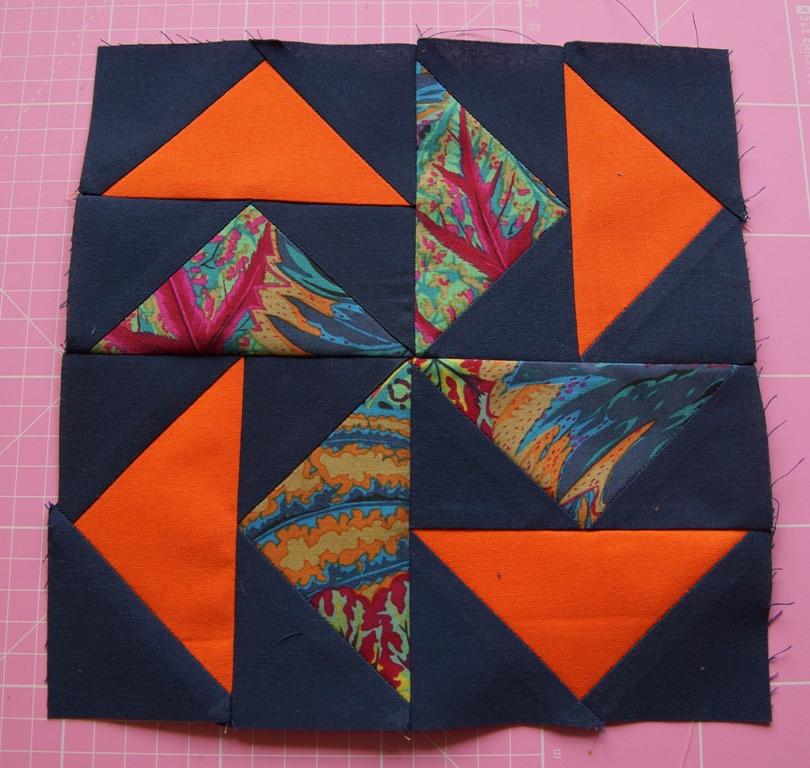
In theory, it should measure 9 1/2 inches square (which would be 9 inches finished, because you lose quarter of an inch off each side when you sew it to another block). Mine is only just over 9 inches, so I can’t even pretend to myself that I’ll be able to hide the difference in the seam allowances in the final quilt. It’s just wrong. But it’s such a pretty block!
So now I need to decide do I want to try and make another identical block with the correct seam allowances (I do have another piece of that same fabric in the layer cake, and I’m only planning on having 30 blocks in the quilt in total, and there’s 42 pieces in the layer cake, so in theory I can afford to waste a few), or do I try and adjust all the measurements for the rest of the blocks so they all end up this size (which would make the final quilt quite a bit smaller than I intended, and also mean the measurements I gave you for this block would make it bigger than all the rest of the blocks, if you were following along at home)? I think the most sensible answer is to make it again, isn’t it? It would give me a chance to practice getting those seam allowances right before I move onto the next block, too.
Yep, I’m going to have to make it again. But not tonight.
This is a perfect example of why I will never be a quilter.
But I love watching YOU do it!
Wow.
Other people’s craft always seems so impressive – I feel exactly the same way about your weaving!